Speedia Control uses openSUSE MicroOS as its base operating system. However, DigitalOcean, as many cloud vendors, does not provide MicroOS out of-the-box unfortunately.
In this article you'll learn how to upload openSUSE MicroOS to DigitalOcean, configure it with Droplet Console and then deploy Speedia Control. Don't worry, we'll soon have an image of Speedia Control on the marketplace so you can deploy with a single click.
- Navigate to openSUSE MicroOS official site. Get the download URL for the
x86_64version of QEMU image from the Base System + Container Runtime Environment column;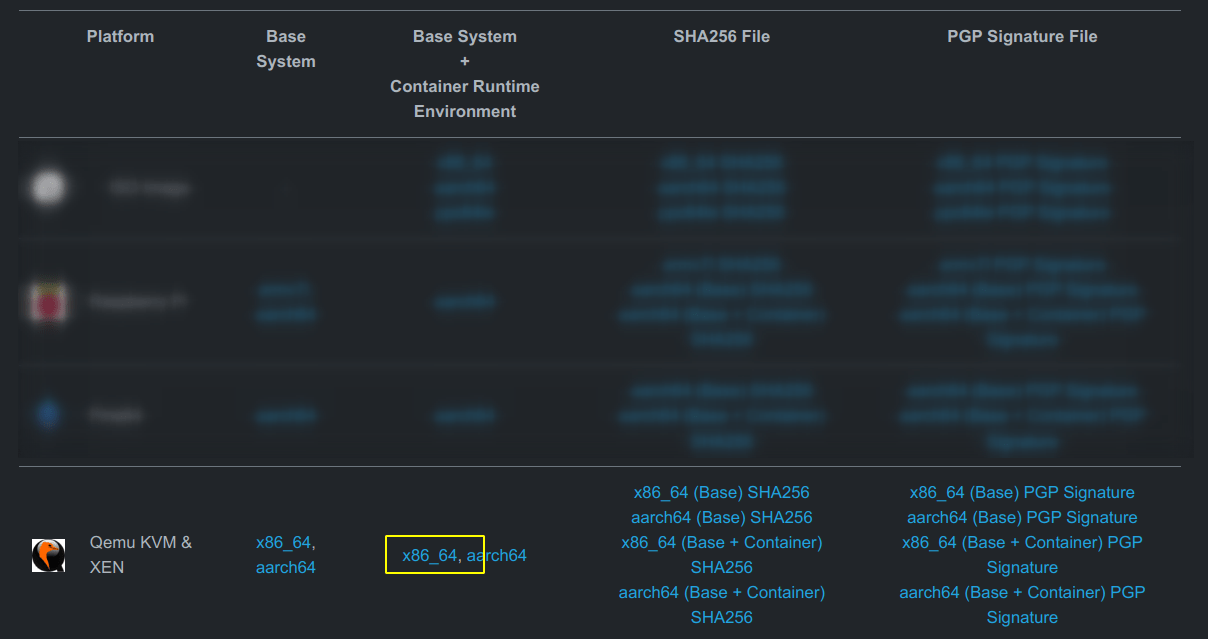
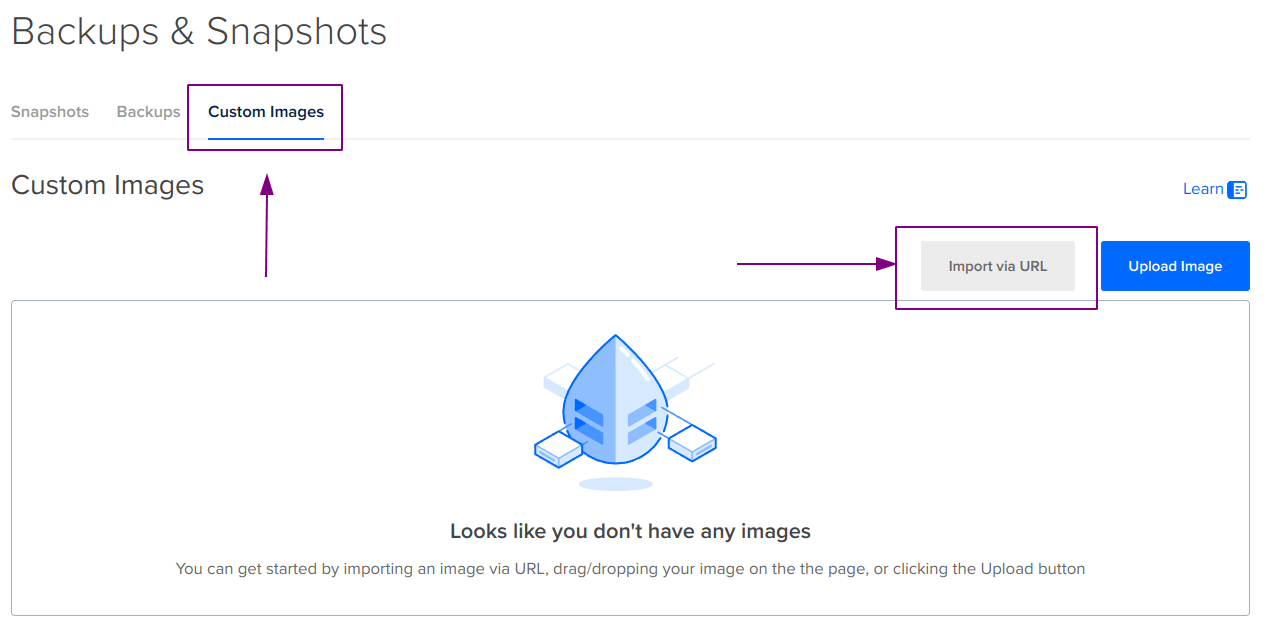
- On the DigitalOcean Console, navigate to Backups & Snapshots, click on Custom Images tab and click on Import via URL;
- Paste the download URL and click on Next;
- In the Upload an Image modal:
a) Search for "SUSE" or "openSUSE" on Distribution field, but if it doesn't exist, select "Unknown";
b) Select the region you want to build the Droplet. You can add this image to another regions later;
c) Edit or fill up the other fields if you want;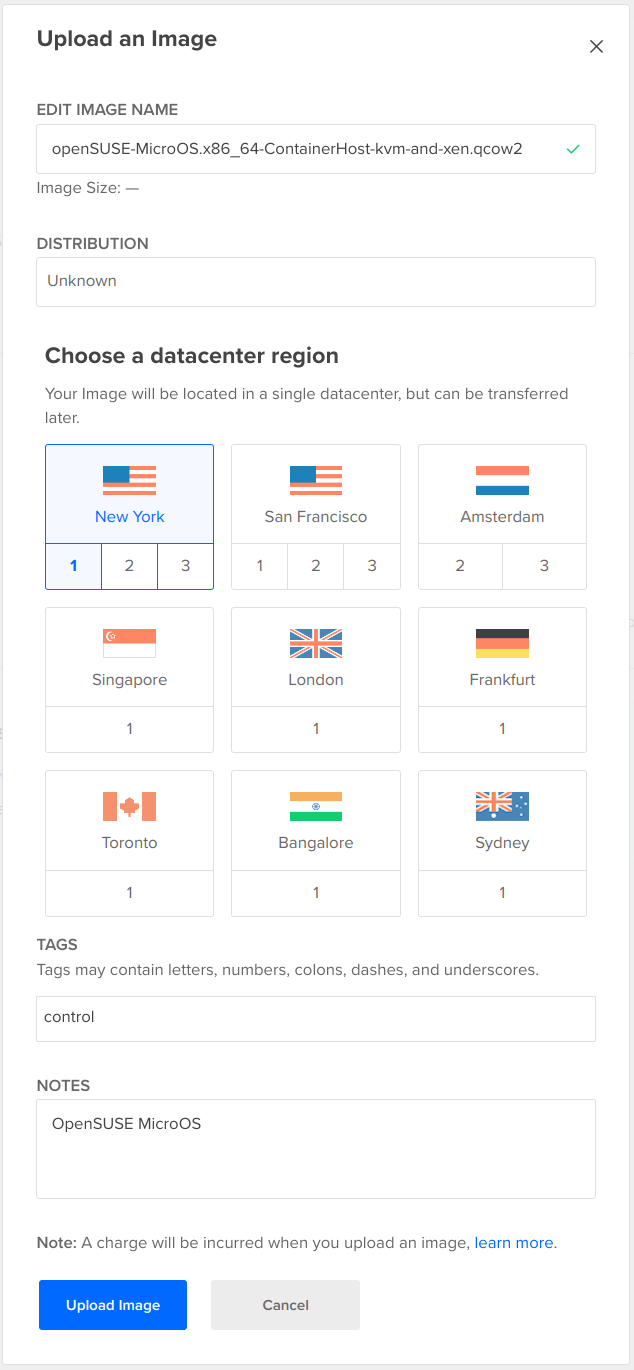
Tip 1: This process will take long (more than 30 minutes). May be a good time to take a coffee.
Tip 2: Or you can download the image to your machine and upload it using the Upload Image button, instead of Import via URL. This way it will be a little faster. - Once the upload is done, it's time to Create a new Droplet;
a) Choose the Region and Datacenter where you uploaded the MicroOS image;
b) Select the image on Custom images tab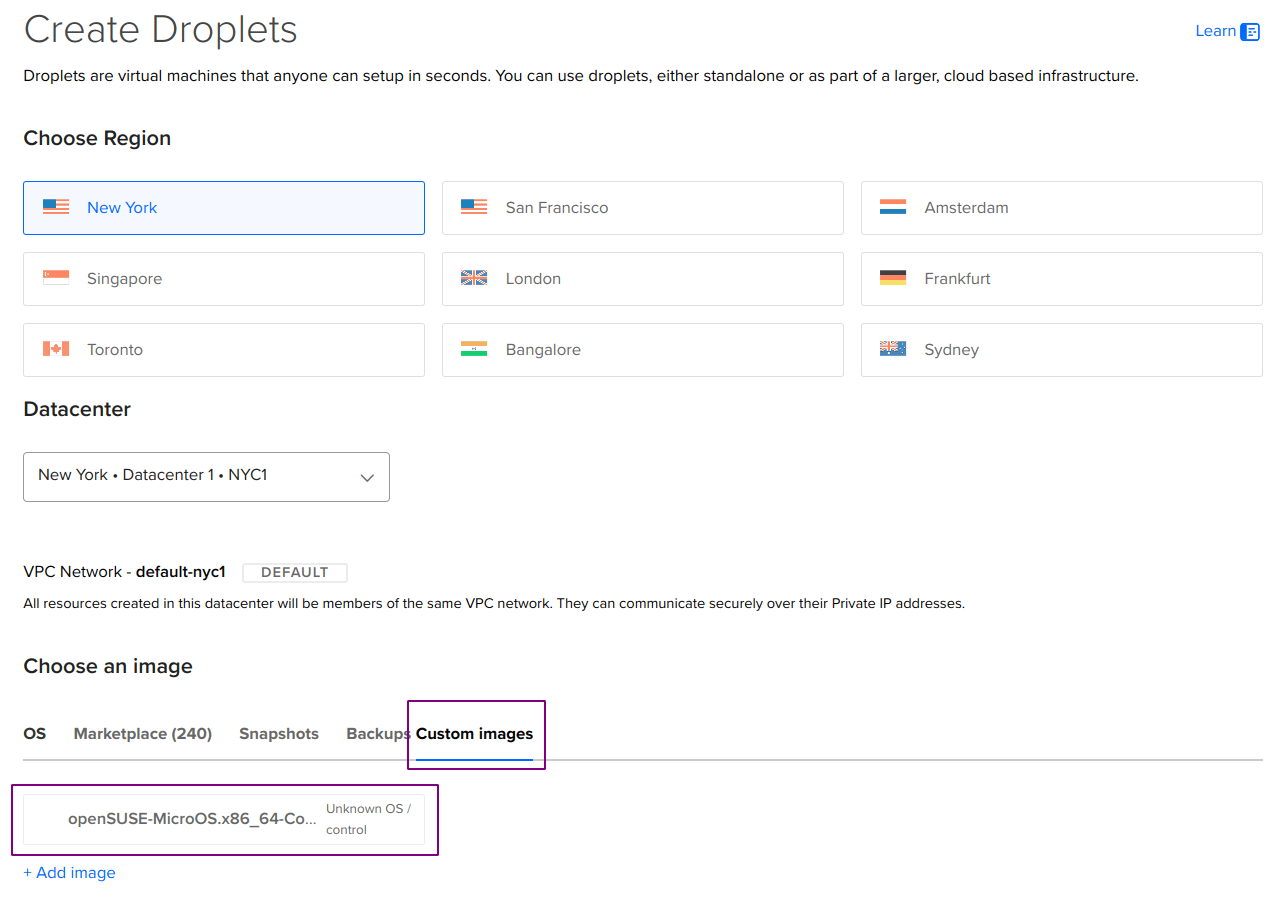
c) Choose a size;
Speedia Control runs on512MBinstances, but we usually recommend2GB RAMfor a basic deployment.
d) Add an additional volume with at least50GBand select Manually Format & Mount;
e) Select your preferred way of authentication, but we recommend you to use SSH keys;
f) Give the instance a name - usually the hostname is used;
g) After reviewing, hit the Create Droplet button; - Navigate to the Droplet page;
- On the left menu, open Access and click on Lauch Recovery Console;

- When the connection is established you should see the setup wizard from MicroOS;

- First, the setup wizard will request the keyboard layout, the timezone and a password for
root. When it asks if you want to set the SSH key, select No for now. Once the wizard is finished, the instance should reboot and you'll see just a login section;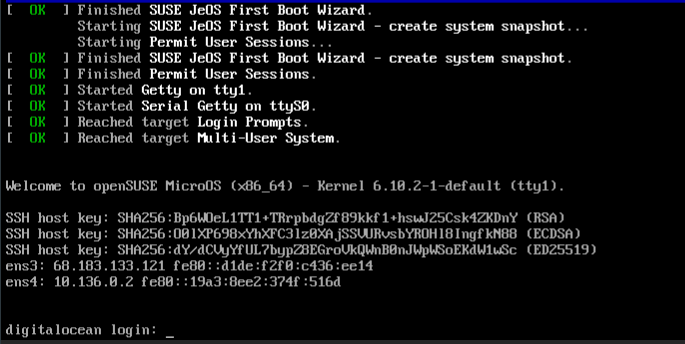
- Still on Recovery Console, log in as
rootand usecurlto upload your SSH public key and save it as theauthorized_keysfile:
You can also use GitHub Gist or Pastebin.com to host your SSH public key, just make sure you download the Raw version with curl so there is no HTML tags in it.curl -skL https://yoursite.com/your_public_key -o /root/.ssh/authorized_keys - Exit from your logged-in session and close the Recovery Console;
- You will now need to get the Public IPv4 address. As DigitalOcean droplets have ephemeral IPv4, you have the option to add a Reserved Public IPv4, but this is up to you;
- Open a terminal or PuTTY section in your computer and attempt to connect via SSH as
rootwith the public IP address of the instance and the private key matching the public key you uploaded torootuser; - Install the
unzippackage and reboot the droplet:transactional-update pkg install unzip
reboot - Create the
/var/speedia/directory, upload the Control zipped binary to it, unzip it and set the execute permission:mkdir /var/speedia
curl -skL https://speedia.net/control/download -o /var/speedia/control.zip
unzip /var/speedia/control.zip -d /var/speedia/
chmod +x /var/speedia/control - Run the install command:
/var/speedia/control sys-install
The instance will reboot once or twice. - Refresh the license:
control license refresh
- Create the first user with the following command:
control account create -u youruser -p passwordhere
- And it's done!
You should be able to access the Control dashboard now athttps://yourpublicip:3141/_/.
Don't forget to ignore the SSL warning as there is no valid SSL issued yet.